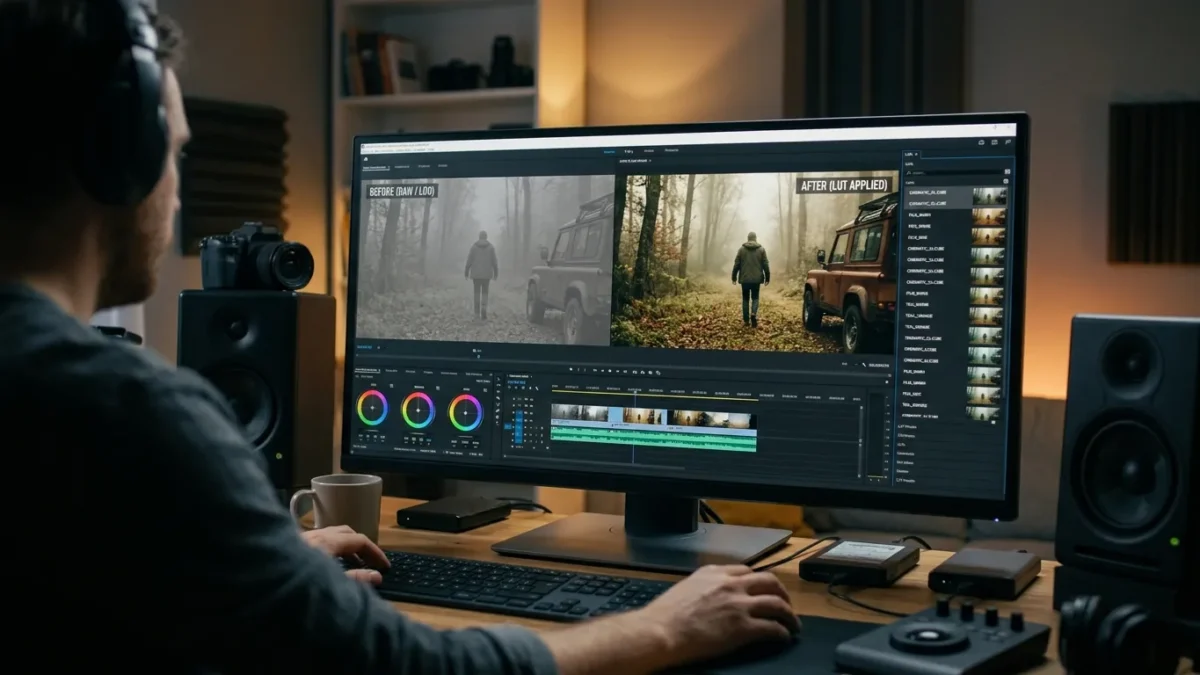
A look-up table (LUT) in video editing is a mathematical file that maps input color values from your camera footage to specific output color values. Editors use these files to transform flat profiles into realistic images or apply distinct creative styles. At BoringMagazine.Co, we explain modern media production. If you want to master editing workflows, our Entertainment guides cover the tools behind modern filmmaking.
When digital cinema cameras record scenes, they often save footage using logarithmic gamma curves. This raw footage looks washed out on a computer monitor, with low contrast and muted tones. Applying a LUT converts those raw sensor values into standard color formats so displays show accurate highlights, midtones, and shadows.
How Mathematical Color Transform Matrices Work
At its core, a LUT operates like an indexed dictionary for digital pixels. Every pixel contains numerical data representing red, green, and blue (RGB) color channels. Without a LUT, a computer processor must calculate complex mathematical formulas for every pixel on each frame. A LUT simplifies this process by providing a preset table of conversions. The editing software reads the incoming color coordinate and looks up the replacement coordinate.
These tables come in two distinct formats: 1D LUTs and 3D LUTs. A 1D LUT is a simple one-dimensional array that processes each color channel independently:
- Red input maps directly to red output.
- Green input maps directly to green output.
- Blue input maps directly to blue output.
Because a 1D LUT cannot cross-reference channels, it only adjusts basic contrast and brightness curves. It cannot change the saturation of a specific hue without shifting the entire image.
A 3D LUT uses a three-dimensional coordinate grid shaped like a cube. The three axes represent red, green, and blue values. Because the channels interact across this cube, a 3D LUT can shift a specific hue, adjust saturation, and alter brightness at the same time. Professional software uses interpolation to calculate values between the fixed grid points. Common grid sizes include 17x17x17 and 33x33x33 points.
Log Contrast Curves and High Dynamic Range Sensors
To understand why LUTs are necessary, you must examine how digital sensors capture light. Camera sensors record light linearly. If an object reflects twice as many photons, the sensor records twice the electrical charge. Human vision works differently. Our eyes perceive light on a logarithmic scale, making us far more sensitive to subtle variations in dark areas than in bright highlights.
If a camera writes linear data directly to a standard video file, bright highlights consume most of the digital information. Shadows get compressed into few digital code values, causing noise and banding. Camera makers solve this by applying a logarithmic curve during recording, creating log footage. Common examples include Sony S-Log3, Canon C-Log, and ARRI LogC.
Log profiles distribute data evenly across the full dynamic range of the sensor. This protects bright skies from clipping and keeps dark shadows clean. Just as filmmakers account for physical camera artifacts like rolling shutter distortion during capture, they must manage dynamic range profiles in post-production. The flat image recorded on set is simply a container designed to preserve image detail.
Technical Conversion Versus Creative Color Grading
Video editors often confuse technical conversion LUTs with creative look LUTs. While both use the same file format, such as a .cube file, they serve completely different purposes in a color grading pipeline.
A technical LUT performs an exact mathematical translation between two defined color spaces. For example, it converts footage recorded in ARRI Wide Gamut / LogC into the standard Rec. 709 color space used by consumer monitors. This step is objective. There is no artistic interpretation; the goal is simply to restore natural contrast and correct saturation based on manufacturer color science.
A creative LUT applies an artistic look. It might push teal into the shadows and warm amber into the highlights to mimic film stock. Editors frequently pair these stylistic palettes with deliberate framing choices like cinematic aspect ratios to create a cohesive mood. Creative LUTs should only be applied after the footage has been normalized.
A Reliable Color Pipeline for Video Post-Production
Applying a LUT at the wrong stage of your workflow will degrade image quality and clip data. Professional colorists follow a structured pipeline to protect image integrity:
- Exposure Correction: Balance exposure and white balance before applying conversion transforms so adjustments use the full bit-depth of the log profile.
- Technical Normalization: Apply the camera manufacturer’s technical LUT to map the log footage into your working color space.
- Secondary Corrections: Fine-tune skin tones, isolate specific colors, and balance contrast across different shots.
- Creative Grading: Add your creative LUT or film print emulation to give the scene its final aesthetic style.
- Output Delivery: Check scopes to confirm signal levels comply with broadcast or web standards.
Placing exposure corrections after a technical LUT often clips highlights. Once a technical LUT compresses wide log values into standard display limits, highlight data pushed above peak brightness is lost.
Common Color Grading Mistakes and Misconceptions
One common mistake is treating a LUT as an automatic fix for poorly shot video. A look-up table applies a fixed mathematical offset to every pixel. If your clip was underexposed on set, applying a conversion LUT produces a dark, noisy image. You must always correct exposure errors first.
Another frequent error is stacking several creative LUTs together. Each 3D LUT introduces small rounding calculations. When you run footage through multiple tables, these mathematical shifts accumulate, creating harsh posterization, broken color gradients, and digital noise.
Editors also make the mistake of mismatched color spaces. Applying a LUT engineered for Panasonic V-Log onto Sony S-Log3 footage produces inaccurate skin tones and tint errors. Always use conversion tables that match the exact camera profile used during recording.
Finally, remember that a LUT cannot add dynamic range to your footage. If a window clipped to pure white during filming, no mathematical table can reconstruct the missing outdoor details. LUTs only redistribute existing digital data.
FAQ
Can you use a LUT instead of manual color grading?
A LUT cannot replace manual color grading because it applies a fixed formula without adjusting for exposure errors or shot-to-shot lighting variations. While a LUT speeds up the process of converting flat log profiles, you must still balance individual clips, correct skin tones, and match camera angles by hand.
What is the difference between a 1D LUT and a 3D LUT?
A 1D LUT adjusts red, green, and blue color channels independently along a single curve, while a 3D LUT maps color shifts across a three-dimensional cube for complex hue, saturation, and brightness changes. Because 3D LUTs allow color channels to interact, they are the standard choice for film emulation and professional grading.
Should you apply a LUT before or after exposure adjustments?
You should always place exposure and contrast adjustments before a technical conversion LUT in your node or layer pipeline. Making primary adjustments before the LUT allows you to manipulate the full dynamic range captured by your camera sensor without clipping highlight or shadow information.